After completing my design Pack, I now decided to get building some models from the inspiriting images I had collected in the design pack. I decided to make my models look like the images I gathered on my design pack, but also I planned on changing some of their features.
*(My dates are not in order as my productions were varied; meaning that I worked on many models at the same time)*
Start Date - 15/1/2015
I decided to build a table first of all. To do this I used the box tool mostly to create the table legs and then the body. I decided to use a more rectangle shape for the table as I believed this would look better.
Now the table legs were made I began building the main body (the table top) When I had made and put in place the table top I checked out the table and tweaked parts to make them better.
Now the table structure was complete and so now it was time to use the UV mapping tool to add a texture to it. Firstly I began by looking on the internet.
Once I had found a texture online I placed the image in Photoshop. This way I could use editing tools to then put the texture on Unity
After modifying the image on Photoshop I then opened my surface area on Modeler and opened up the texture onto my table.
After this I was happy to see the results of the table as it looked realistic and wild west based.
End Date - 15/1/2015
Start Date - 8/1/2015
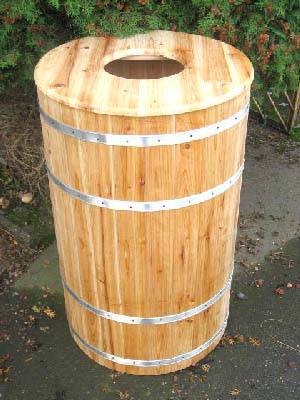
I decided to create a container. Considering my environment is a Red Indian Campsite, I thought this prop would be appropriate. I began by creating a cylinder using 3D modeler.
At this point I decided to bevel the top of the cylinder to create a hole. Around he hole I raised the sides using multishift. Also I decided to make the hole not to deep. I then use the knife tool to slice the object up into different sections.
I decided to use the knife tool to put the object into different sections as I wanted to then bevel the sides so that I could pull parts of the object out to give the container more features.
I then gave the object a brown surface to get an idea of what the container was looking like and then I edited the top of the container by pulling some polygons upwards to create a barrier around the top.
I wanted to give my object a UV Map feature so likewise with the table, I UV mapped the object after modifying it on Photoshop using an image from the Internet. I decided to get an image of a wooden container texture.
I used surface editor to then add the new texture on to the wooden container, I then checked the model as an overall checkup.
End Date 22/1/2015
Start Date - 8/1/2015
I decided to begin making a box as a prop for my game. I started off by creating a square shape with the box tool. I then created a rectangle on another layer.
I then beveled the box and the rectangle to go inwards and then copied and pasted the rectangle over to the layer with the box on. I then placed one rectangle on to the side of the box and copied and pasted it. Then after rotating it, I placed the other rectangle to the side and this gave a cross like effect to the box.
I then needed to copy and paste the rectangles and placed them in the same position a on that side but for all the sides including the top of the box.
When that was done I decided to give the object a surface using the UV mapping on Photoshop technique as done for the last 2 objects. By following the same steps I soon had the textures on my object. I gave the box 3 different textures and the final piece now looked better and more realistic.
End Date 22/1/2015
Start Date - 13/2/2015
I also decided to build a shovel as I was still following my design pack ideas. I closely looked at the shovel on my design pack and did my best to create the shovel. I started by creating a handle for the shovel and then went on to building the body.
I then began building the head of the shovel and beveled one side of the shovel head inwards to give the object more shovel like features.
I also went over the shovel and tweaked part of it such as the handle and shovel body. Now it was time to texture the object. Likewise with the Box object etc; I decided to texture my box with the same technique, meaning I UV mapped the object using Photoshop.
End Date 13/2/2015
I gave the shovel head and handle a metal texture; but gave the shovel body a wooden texture to give the shovel a realistic look. I mostly used the capsule tool and circle tool to create the parts.
Start Date 8/1/2015
I decided to build a log pile as this was also in the design pack. To build this the I would need to create logs using the disc tool.
I wanted to stack the logs upwards to create the "pile" and so that's what I aimed at doing for this object.
Now I had the triangle shape made from logs, I observed the object and decided to make the logs larger as I though it would look better. After enlarging the discs "logs" I the used the same technique as on the shovel to give the object a texture
End Date 26/2/2015
Overall the result of this object looked good and realistic which is what I was aiming for.
Start Date 22/1/2015
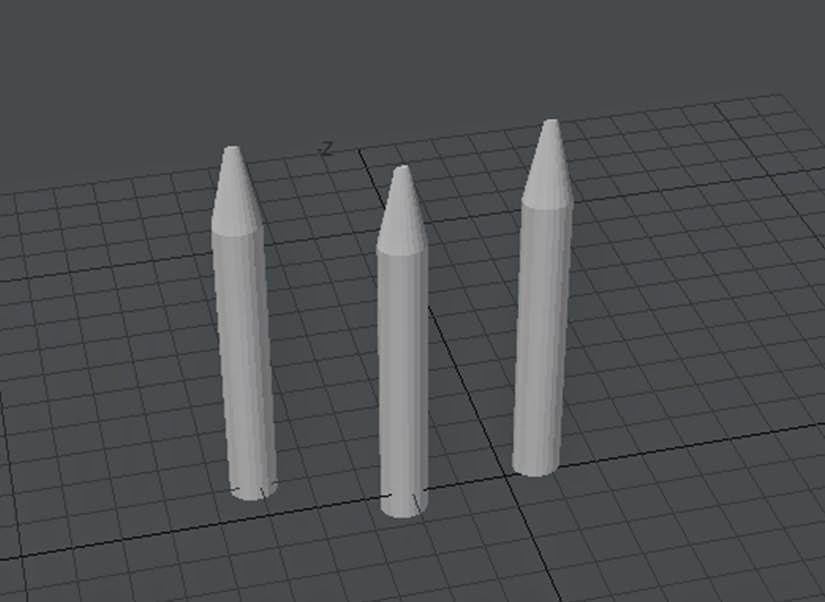
I decided to build a ramshackle defensive wall made from sharp logs. Likewise with the logs I used the disc tool to create the log like features. I then used the multishift tool to create the spikes on the top of the objects.
Then I copied and pasted the discs with the sharpened edge and rotated some to make the fence look ramshackle and old.
Now it was time to add a texture to the fence. I used UV mapping as this seemed to work best on this object as it had on all the others. After I had UV mapped the texture on using Photoshop; I observed the object and made sure the object was suitable.
End Date 22/1/2015
I also used the same texture from my log pile object on this object as both objects were portraying the same things e.g. logs; but they are just being used differently
Start Date - 8/1/2015
After this I had a tent to build and so I began building it. I started by using the cone tool to get the main body of the tent.
I now decided to take away the top part of the cone using the knife tool. I did this so I could add more features to the tent.
Now I could see inside o the shape meaning I could create features for the tent easier and get a clear view in the object. I used many tools from the bevel and multishift tool to add a door to the tent and a frame at the top of the tent.
Now I needed to add textures to the tent and I did this by using the UV mapping technique through Photoshop. I had been using this technique for all my objects as it seemed to work best.
End Date 12/2/2015
Overall the tent looked good on the final result as the design of the tent and the textures seem to work well together.
Start Date 30/1/2015
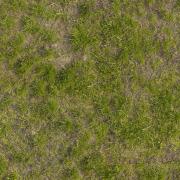
My next task was to create a farm object (land). To do this I needed to go on illustrator and create the guidelines of the farm land object. Once I had the guidelines created using illustrator, I placed them onto modeler so I could model the object further.
I now needed to add a texture and so I decided to use the UV mapping technique to add the texture. I decided to give the object a rocky muddy texture so when in unity I could put grass over it to create the farm like features.
End Date 5/2/2015
Using illustrator did help with creating the farm land object as it gave this a more realistic feature. in which I could work with more using Unity.
Start Date 29/1/2015
For the next object I decided to create a wild west style cannon, in which was not in the design pack. This was a late choice to create this object as I had extra time to use up. I began by creating a wagon like body for the cannon to rest on.
I now decided to work on the wagon wheels as this next step would take time to complete. I focused on the wagon from the design pack to create the wheels as the image from the design pack was guiding me.
Now the wheels were done I wanted to start creating the cannon on top of the wagon. To start the cannon I used the capsule tool and modified it into the shape of a cannon. In addition, I gave some parts of the object a surface texture using the surface editor to get an idea.
Then I added textures to all parts of the cannon and wagon and observed it to check for any problems with the model.
End Date 12/2/2015
The cannon was now done and my last model idea was a wagon. However I realized I could use the wagon part of the cannon object to act as the wagon as this would save me time as the deadline was getting closer and more tasks needed to be completed.
Start Date 5/2/2015
To create the wagon I loaded up the latest save from my cannon object and removed the cannon from the wagon. Then I created a new save and called the object "wagon".
End Date 12/2/2015
This was a good result as I manged to complete 2 models by just creating 1. This saved me time to focus on other tasks which helped me a lot.


